
The long-awaited version 3.5 “Tengen Toppa Gurren Lagann” of the popular JavaScript framework Vue.js was officially released in September 2024. This version brings significant performance improvements and new features that further enhance the developer experience.
If you’re wondering what the main features and most important innovations of Vue 3.5 are, you’ve come to the right place. In this tutorial, we’ll show you not only the proven Composition API, but also new features like Reactive Props Destructure, useTemplateRef() and other optimizations.
The final release of Vue 3.5 was on September 1, 2024 and brought impressive performance improvements:
- 56% less memory usage through optimizations of the reactivity system
- Up to 10x faster operations on large, deeply nested reactive arrays
- New APIs like
useTemplateRef(),onWatcherCleanup()anduseId() - Reactive Props Destructure is now enabled by default
In this article, we will answer the following questions:
- What is Vue?
- What is the Composition API?
- What new features does Vue 3.5 bring?
- How do I use the new APIs effectively?
In this free online tutorial, we will create two versions of the same component: one with the Composition API, the other with the Options API, the current standard for writing components in Vue.js. If you want a more structured and hands-on introduction in the form of a training course, check out our Vue & TypeScript Intensive Training.
What is Vue?
Vue (or Vue.js) is an open-source JavaScript framework for frontend development. Unlike other popular JavaScript frameworks, Vue is not backed by a large company like React (Facebook) or Angular (Google). Vue was originally written by Evan You and is now maintained by a larger open-source community.
As with all common frameworks, Vue also works in a component-oriented way. An application is broken down into smaller parts (building blocks, components). This creates easily reusable and maintainable units that are arranged in a hierarchical structure to assemble a larger application piece by piece. Components thus form the fundamental building blocks of an application. The following graphic illustrates how a website can be broken down into components and related to each other in a tree structure:

More information can be found in the official Vue Documentation.
What is the Composition API?
The most important thing first: The new API is purely additive, doesn’t break existing code, and doesn’t even have to be used! You can continue to work with the Options API. The new Composition API is simply an extension of the existing framework to address limitations of Vue 2.x that particularly arose in large applications. The Composition API provides a way to use Vue’s familiar Reactivity in all parts of the application without compromising organization and readability.
Essentially, the Composition API doesn’t add anything new to the framework. It makes some of the originally internal functions available for direct use within and outside of components.
The term Composition describes another essential part, namely the simplified construction of components. The new Composition API is a way of composing parts so that a component is created in the end.
Why the new Composition API?
As Vue projects grow in size and complexity, the components within them have been difficult to maintain and manage. In Vue 2.x, components are organized using various options (data, methods, computed,…), hence the term Options API. Additionally, there are numerous so-called Lifecycle methods that can be added to react to and even intervene in certain situations.
Due to this division, components become difficult to read as they grow, since you often jump back and forth between individual sections to understand how they work. Another disadvantage of this organization is that it makes code reuse difficult, since a feature can be scattered throughout the entire file. There are various workarounds, but they come with their own disadvantages.
Another important point is the current TypeScript support. The Options API relies on a lot of “magic” from the Vue compiler, which makes using this within components very difficult to combine with TypeScript.
The Composition API, due to its structure and simplicity, is free from these disadvantages, so it behaves as expected in JavaScript. This enables much better TypeScript support when using the Composition API.
Vue 3
There are several ways to install Vue 3. The Vue team provides an official CLI to set up applications. Since this is usually the optimal way, we’ll do the same. First, we install the CLI using the Node Package Manager:
npm install -g @vue/cliCreating a new project is done with the following line:
vue create vue-3-5-tutorialAs a preset, we choose Vue 3 here. Since Vue 3.5, we automatically benefit from the performance optimizations:
- 56% less memory usage through an optimized reactivity system
- Up to 10x faster operations on large arrays
- Improved SSR performance and no more stale computed values
The setup and configuration of our new project then takes place. Once the process is complete, the next steps to run the Vue application are displayed:
cd vue-3-5-tutorial
yarn serve
# OR
npm run serve
The running application can be accessed in the browser via the displayed URL, which is http://localhost:8080/ by default.
1. Bootstrapping the Application
The way a new Vue application is created has changed with version 3. To see this, let’s take a closer look at the src/main.js file with any editor.
import { createApp } from "vue";
import App from "./App.vue";

createApp(App).mount("#app");
Instead of new Vue, the createApp function is now used, which must first be imported.
The function receives our root component, i.e., the root of our application, as the first parameter.
The component can be defined here or imported as in the example application (App.vue).
Using the mount call and passing a CSS selector, we tell Vue where our application or component should be mounted in the DOM.
You can find the HTML file with the element with ID app under public/index.html. Once the browser has downloaded and executed the HTML file and associated resources, our Vue application is loaded into the div element with the ID app.
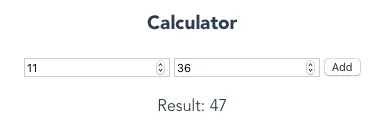
2. Creating the First Component
We create a simple component for adding two numbers. The preliminary result looks like this:
In the components folder, we first create a new file called Calculator.vue:
<template>
  <h3>Calculator</h3>
  <form>
    <input type="number" />
    <input type="number" />
    <button type="submit">Add</button>
  </form>
  <p>Result:</p>
</template>
<script></script>
<style></style>
1. The Structure of a Component
The file structure follows the well-known Single-File-Component schema, which is de facto the standard for Vue applications.
The template represents the HTML to be rendered for the component and can be enriched with Directives and Interpolations to implement the logic.
Almost all template engines work according to this principle.
The script part is used for the “more complex” JavaScript logic of the component and allows it to be configured.
Finally, the CSS rules for this component are stored in the style tag. However, if you don’t use the scoped attribute, the rules specified there apply to the entire application. It’s advisable to use a more advanced methodology like BEM.
Since this would go beyond the scope of this tutorial, we’ll remove the style tags in the following and focus only on the component’s logic.
2. Writing the script Part
Our component needs three variables. num1 and num2 are needed for the user’s input values, sum contains the result of the addition. We can assign several state variables to a component using the data option.
To do this, we extend the script part of the file as follows:
export default {
  data() {
    return {
      num1: 0,
      num2: 0,
      sum: 0,
    };
  },
};
To perform the addition, we also use a method. This is declared in the methods option. The function must not be written as an arrow function, otherwise we lose the reference to this.
export default {
  data() {
    return {
      num1: 0,
      num2: 0,
      sum: 0,
    };
  },
  methods: {
    add: function () {
      this.sum = parseInt(this.num1, 10) + parseInt(this.num2, 10);
    },
  },
};
This example also shows the use of this. The Vue compiler ensures that options can access each other via this and that all variables defined in data are also initialized, making them available to the context.
Values in input fields are always represented as strings. Therefore, we need the parseInt method. This converts the input values to numbers.
The second parameter should always be used, as it specifies the underlying number system for the conversion. 10 stands for the common decimal system.
With that, the script part is initially complete. Next, we’ll integrate the display control into the template.
3. Enriching the template Part
First, we take care of outputting the result sum, since this is just a simple text interpolation. Vue uses the so-called Mustache syntax, which is written with two curly braces:
<template>
  <h3>Calculator</h3>
  <form>
    <input type="number" />
    <input type="number" />
    <button type="submit">Add</button>
  </form>
  <p>Result: {{ sum }}</p>
</template>
The Vue compiler renders the content of the variable from data in place of sum. But actually, more happens here. As users of the framework, we get out-of-the-box reactivity of the properties.
Everything defined in data automatically receives a watcher. This triggers a re-rendering of the template when the variables defined there change.
In addition to outputting a currently still unchangeable sum of the addition, we should now focus more on linking the input fields with our other two variables num1 and num2.
The template engine provides us with so-called directives for this, which apply side effects to the DOM. These special directives always start with the prefix v- and may only contain simple JavaScript expressions as values.
For our use case, we need a way to create a bidirectional binding between the input field and the associated variable. Vue provides us with the v-model directive for this:
<template>
  <h3>Calculator</h3>
  <form>
    <input type="number" v-model="num1" />
    <input type="number" v-model="num2" />
    <button type="submit">Add</button>
  </form>
  <p>Result: {{ sum }}</p>
</template>
Vue then ensures that the user’s inputs into the input field are reflected in the respective variable. Code-side changes to the variables also cause the input fields in the browser to be updated accordingly.
Finally, we still need to execute the addition when the button is clicked.
We can use the v-on directive to listen to DOM events with an Event Listener. When the event is triggered, the specified JavaScript code is executed.
The type of event is specified after a colon.
<template>
  <h3>Calculator</h3>
  <form v-on:submit.prevent="add">
    <input type="number" v-model="num1" />
    <input type="number" v-model="num2" />
    <button type="submit">Add</button>
  </form>
  <p>Result: {{ sum }}</p>
</template>
When clicking the button, we want to execute our add method to assign sum the value of the addition of num1 and num2. This triggers a re-rendering of the component, causing sum to display the newly calculated value in the template.
An HTML form that contains a button of type submit is automatically submitted when clicked.
Alternatively, the form can also be submitted with Enter, which is the better solution for accessibility reasons.
Therefore, it’s not necessary to set a click listener on the button itself, but to intercept the submit event on the form.
The browser’s default behavior when submitting a form leads to a redirect to the action specified in the form.
We want to handle the form and the entered data in JavaScript code on the current page and not trigger a redirect to another URL. Therefore, we prevent the default behavior at this point.
Modifiers can be attached to an event listener via dot notation to automatically execute the associated logic.
In our case, it’s prevent, which prevents the default behavior of the event before finally calling our add method. When the form is submitted, we prevent the redirect and instead pass the event to the specified JavaScript function.
The v-on directive can and should be replaced by the @ character for better readability, so we get @submit.prevent="add".
💡 Don't feel like reading?
Not everyone learns best from books and articles. Learning can be interactive and fun. We also offer Vue Intensive Training, so you can dive deeper into the topic.
More information about Vue3 Training
Multi-Root Templates
Since Vue 3, thanks to a feature called Fragments, it’s no longer mandatory to have only a single root element in the template.
This change means that the code shown above is now finally valid and you don’t have to add an extra wrapping div element, as was the case in Vue 2.x.
3. Including Our Component
To test our component, we need to include and use it in our application. To do this, we open src/App.vue and first import our component by adding the following line in the script part above the export:
import CalculatorApp from "./components/Calculator.vue";We now register our component as such and make it known to the application. The Options API provides another property for this, namely components.
The components option is an object that contains the tag name as key and the component or its configuration object as value:
export default {
  name: "App",
  components: {
    CalculatorApp,
  },
};
Here we use the shorthand notation, which can be used since ECMAScript 2015 (ES6), by simply specifying CalculatorApp.
In the template part of our root component App.vue, we can now use <CalculatorApp /> anywhere to render our component there:
<template>
  <div id="app">
    <CalculatorApp />
  </div>
</template>
Due to the type of component registration used here, we can write the component in Single-File-Components (SFC) in both Kebab Case (calculator-app) and Pascal Case (CalculatorApp).
Normally, Kebab Case is preferred because this notation corresponds to the W3C standard and HTML is case-insensitive. That means it doesn’t distinguish between upper and lower case. However, since we’re using SFCs anyway and they’re processed by the compiler beforehand, it’s recommended to use Pascal Case notation in Vue applications for the following reasons, among others:
- Code editors can autocomplete component names because Pascal Case notation is also used in JavaScript.
<MyComponent />differs more visually from standard HTML elements than<my-component />, as it stands out more due to the capital letters.
How Vue works internally and what ultimately ends up in the browser from our Single-File-Components and how can be read here and here.
4. The Vue DevTools
When working with Vue, the Vue DevTools are essential in addition to the tools you’ve learned about. It’s an add-on for Chrome or Firefox browser that extends the developer tools with an additional area for Vue. This provides us with a lot of information about the application and the Vue components used.
After installation and restarting the browser, we can open the developer tools using the keyboard shortcut [Cmd+Option+I] (Mac) or [Ctrl+Shift+I] (Windows). In the list of tabs, we look for the Vue entry and click on it:
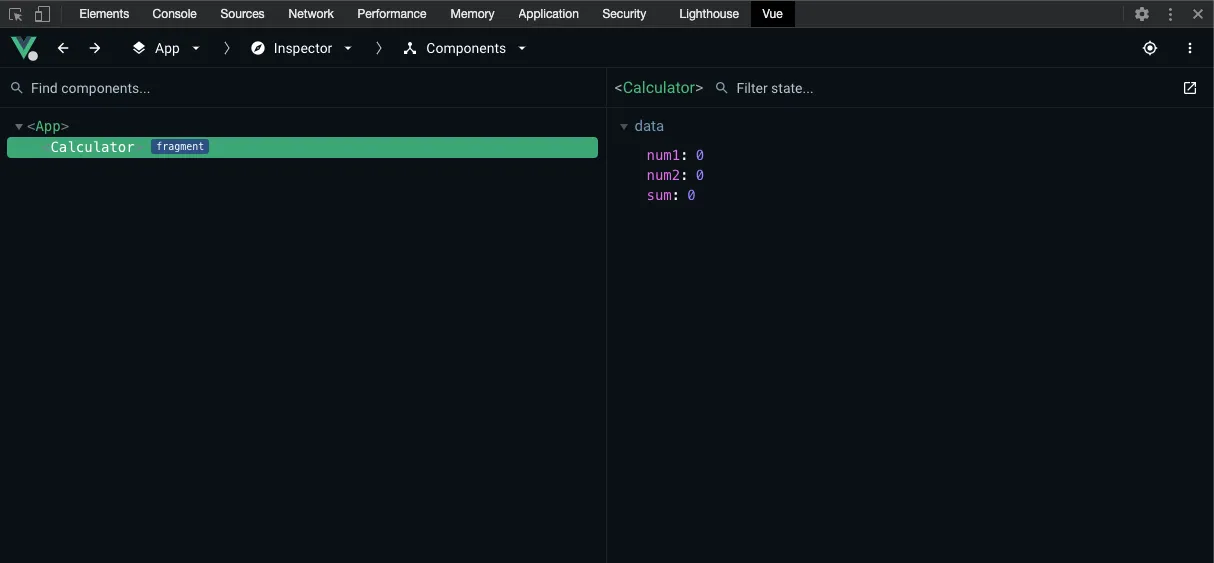
In the figure, we see the component tree on the left, which contains the App component and below it our self-created CalculatorApp component.
On the right side, we see detailed information about the selected component.
5. New Features in Vue 3.5
Vue 3.5 brings some practical new features that we can use in our component. Let’s get to know a few of them!
useTemplateRef() - The New Way to Use Template References
In Vue 3.5, there’s a new, more type-safe method to access DOM elements. Let’s extend our Calculator component with a function that automatically focuses the first input field:
import { ref, computed, onMounted, useTemplateRef } from "vue";

export default {
  setup() {
    const num1 = ref(0);
    const num2 = ref(0);
    const sum = computed(
      () => parseInt(num1.value, 10) + parseInt(num2.value, 10)
    );

    // New Vue 3.5 API for template references
    const firstInputRef = useTemplateRef("firstInput");

    onMounted(() => {
      // Focus the first input field when the component loads
      firstInputRef.value?.focus();
    });

    return {
      num1,
      num2,
      sum,
    };
  },
};
And in the template, we add the ref attributes:
<template>
  <h3>Calculator</h3>
  <form>
    <input type="number" v-model="num1" ref="firstInput" />
    <input type="number" v-model="num2" />
  </form>
  <p>Result: {{ sum }}</p>
</template>
The advantage of useTemplateRef() over the old method is that it’s more type-safe and works better with TypeScript. The Vue Language Tools provide automatic completion and warnings based on the ref attributes in your template.
Refactoring with the Composition API
For demonstration purposes, this fairly manageable component should suffice for now. In addition to some other innovations in Vue 3, we now want to deal with the Composition API.
The new API allows us to define components with a setup function instead of a large object consisting of predefined keys (options).
First, let’s look at a refactoring of the previously created component with the Composition API, and then answer the last open question of the article: How does the Composition API work?
The functionality of the component is not changed by the refactoring, and the template remains completely unaffected. As we’ll see shortly, the rendering process cannot be influenced by the way the logic is defined.
1. Rewriting Component Logic
As mentioned above, with the Composition API, the way of configuring a component is reduced from a large object to a setup function. Accordingly, we start with a refactoring in the following schema:
export default {
  setup() {},
};
Since Vue is supposed to get closer to the classic way of working of JavaScript developers with the Composition API, we declare the required variables and functions within the setup function as follows:
export default {
  setup() {
    const num1 = ref(0);
    const num2 = ref(0);
    const sum = ref(0);

    function add() {
      sum.value = parseInt(num1.value, 10) + parseInt(num2.value, 10);
    }
  },
};
In principle, the existing code already looks like familiar JavaScript, which doesn’t seem to be framework-agnostic. We do use ref and have to assign the variable via the .value statement, but none of this is atypical for JavaScript.
What has also changed is that we no longer use this to reference variables.
By using the API functions (ref) directly instead of through the options as in the previous example, the magic that otherwise takes place in the framework is abstracted away.
To make the code runnable, we of course still need to import ref, directly from Vue:
import { ref } from "vue";

export default {
  setup() {
    const num1 = ref(0);
    const num2 = ref(0);
    const sum = ref(0);

    function add() {
      sum.value = parseInt(num1.value, 10) + parseInt(num2.value, 10);
    }
  },
};
With that, the refactoring is almost complete. Now we just assign the variables and functions to the template.
The procedure is the same as with other functions, because setup is also just a simple JavaScript function. All defined properties can be returned using a return statement.
import { ref } from "vue";

export default {
  setup() {
    const num1 = ref(0);
    const num2 = ref(0);
    const sum = ref(0);

    function add() {
      sum.value = parseInt(num1.value, 10) + parseInt(num2.value, 10);
    }

    return {
      num1,
      num2,
      sum,
      add,
    };
  },
};
If we now switch back to the browser, we should still find the already known functionality.
How Does the Composition API Work?
All the reactivity that is otherwise handled by the framework behind the scenes and made available to us as users almost magically out of the box is now usable via individual exported functions.
In the example, we see the use of ref. This way, we now make the variable reactive, so to speak, manually. The ref function accepts a value and then returns a Reactive Reference.
The concept of working with such references runs through the entire Composition API. For web developers, it’s important to understand the basic functionality.
A detailed description can be found in the following article: The Composition API.
Primitive data types in JavaScript (essentially non-objects, such as a string) are passed as copies and not as references.
This causes references to be “lost” when passed to functions, making it impossible to map reactivity. ref, on the other hand, creates an object from the initial value and thus enables values to be passed as references.
The returned object from ref has only a single property: value refers to the actual value of a reference and can also be used as a setter, as we can see in the example of the add function above.
The attentive reader may have noticed that we use .value exclusively in the JavaScript code, but not in the template itself. This is because the Vue compiler automatically performs the unwrapping, i.e., unpacking the value, in the template.
ref vs. reactive
It’s simpler when working directly with an object, since the problem with passing references doesn’t exist for the reasons mentioned. If we were to create not three individual variables but work with a single object, the peculiarity with .value could be avoided as follows:
import { reactive } from "vue";

export default {
  setup() {
    const state = reactive({
      num1: 0,
      num2: 0,
      sum: 0,
    });

    function add() {
      state.sum = parseInt(state.num1, 10) + parseInt(state.num2, 10);
    }

    return {
      state,
      add,
    };
  },
};
In the template, the uses of the variables would still need to be prefixed with state., since they are now encapsulated in the state object.
The reactive function is basically the counterpart to ref for objects. It accepts an object and returns a proxy for that object that is tracked.
Here, the detour via .value is not necessary, since objects in JavaScript are passed by reference anyway and therefore no wrapper needs to be created.
For the rest of the tutorial, we’ll continue working with ref.
The Concept of computed properties
As mentioned at the beginning, the Composition API offers the developer an alternative for creating components. Previously, we looked at the basic concepts and structure for writing components with the Options API and the Composition API. The approach to calculating the sum here using a click listener and a function is not optimal. For these purposes, Vue offers us a much more powerful alternative, which we’ll look at in this section.
With so-called computed properties, variables can be defined whose value depends on other (non-)reactive values. These variables are evaluated at runtime and updated as soon as one of the other values changes.
The Composition API also provides its own function for this:
import { ref, computed } from "vue";

export default {
  setup() {
    const num1 = ref(0);
    const num2 = ref(0);
    const sum = computed(
      () => parseInt(num1.value, 10) + parseInt(num2.value, 10)
    );

    return {
      num1,
      num2,
      sum,
    };
  },
};
The computed function returns an immutable (unchangeable) ref object whose value can also be accessed with .value. As a parameter, computed accepts a function.
We use an arrow function in shortened notation, which is why we don’t need a return here to return the result of the addition.
computed can also accept an object with a setter function to make it mutable if needed.
Vue collects all variables used in the body as dependencies and automatically recalculates sum every time one of the values of these dependencies changes. In our case, that’s num1 and num2.
Furthermore, the value is cached and only recalculated when the value of one of the collected dependencies actually changes.
This means that even if there’s a re-rendering of the component for another reason, Vue is smart enough not to recalculate the computed properties and simply output the previously stored value.
In contrast, a simple function is executed every time, since no dependency tracking takes place here.
Due to the changes made, we can modify the template as follows:
<template>
  <h3>Calculator</h3>
  <form>
    <input type="number" v-model="num1" />
    <input type="number" v-model="num2" />
  </form>
  <p>Result: {{ sum }}</p>
</template>
As we can see, we no longer need the button or the event listener, since Vue automatically re-renders the component due to the reactivity of the variables and dependencies of the computed property as soon as we edit one of the input fields.
computed Using the Options API
In a classic Vue component, we would write a computed property as follows:
export default {
  data() {
    return {
      num1: 0,
      num2: 0,
    };
  },
  computed: {
    sum() {
      return parseInt(this.num1, 10) + parseInt(this.num2, 10);
    },
  },
};
With computed, we see another option of the configuration object from the Options API. We have removed sum as a variable from data and moved it to computed.
It’s again an object in which computed properties are defined as functions.
Contrary to the syntax, we also don’t use sum as a function call in the notation sum() in either the script or template part, but like a normal variable sum.
Simplified Component Construction
In the introduction to the Composition API, better code organization and reuse of source code between components was mentioned as another major advantage of the new API.
The component created in this tutorial doesn’t fully exploit the potential of the Composition API in this area, since we have only changed the structure of the component. We can better recognize the benefit of the Composition API in terms of reusability of JavaScript logic when larger components are created or when it becomes necessary to share features across components.
In order not to exceed the scope of this tutorial and still be able to convey an impression of better code organization, we’ll have to use a not quite optimal example.
Adding More Functionality
If everything is moved to the setup method, we haven’t really gained much.
At least one could argue so.
However, the opposite is the case.
The setup method no longer performs any magic in the background. We have built all the logic from simple JavaScript constructs enriched with smaller functions from the framework.
This gives us all the possibilities for structuring and dividing into partial functions.
To do this, we extend our CalculatorApp with another feature that is independent of the actual calculation.
We want to use the numbers api to display interesting facts about the calculated result.
Every time sum is recalculated, we want to have further logic executed. Vue also has a solution for this with watchEffect.
Similar to computed properties, we can also specify a function here, which Vue analyzes and collects all reactive components as dependencies.
The specified function is executed immediately and automatically again whenever one or more dependencies change.
import { computed, ref, watchEffect, onWatcherCleanup } from "vue";

export default {
  setup() {
    const num1 = ref(0);
    const num2 = ref(0);
    const fact = ref("");
    const sum = computed(
      () => parseInt(num1.value, 10) + parseInt(num2.value, 10)
    );

    watchEffect(async () => {
      // New in Vue 3.5: onWatcherCleanup for better cleanup management
      const controller = new AbortController();

      onWatcherCleanup(() => {
        // Cancel ongoing requests when sum changes
        controller.abort();
      });

      try {
        const res = await fetch(`http://numbersapi.com/${sum.value}`, {
          signal: controller.signal,
        });
        fact.value = await res.text();
      } catch (error) {
        if (error.name !== "AbortError") {
          console.error("Error fetching fact:", error);
          fact.value = "Error loading fact";
        }
      }
    });

    return {
      num1,
      num2,
      sum,
      fact,
    };
  },
};
With fact, we have added a new reactive property.
Since we use sum.value within watchEffect, Vue registers sum as a dependency of the effect and executes the specified function every time the value changes.
With the example, we also see the difference to computed properties. Since we first have to perform asynchronous operations like the API call here, after which further side effects are triggered, we have to make use of watchEffect.
computed properties are responsible for defining calculated variables that don’t execute any further logic themselves.
Within the function, we use the API and pass the calculated sum as a parameter. We now add the output of the API result to the template:
<template>
  <h3>Calculator</h3>
  <form>
    <input type="number" v-model="num1" />
    <input type="number" v-model="num2" />
  </form>
  <p>Result: {{ sum }}</p>
  <strong>{{ fact }}</strong>
</template>
We could have implemented the same behavior with the Options API, which is why we now want to look at the division into partial functions and thereby answer the question about the reusability of the Composition API.
Composing a Component from composition functions
Our component obviously consists of two different features. For this reason, we divide our component into individual files. Then we can import and use them in the setup function of the component.
Under src, we create the modules folder with the two files:
use-addition.jsanduse-api.js
It’s not a fixed requirement, but a kind of convention to prefix such reusable composition functions with use.
In use-addition.js, we now outsource the logic needed for our calculation:
import { ref, computed } from "vue";

export default () => {
  const num1 = ref(0);
  const num2 = ref(0);
  const sum = computed(
    () => parseInt(num1.value, 10) + parseInt(num2.value, 10)
  );

  return {
    num1,
    num2,
    sum,
  };
};
use-api.js contains the logic for the API request that was recently added:
import { ref, watchEffect } from "vue";

export default (sum) => {
  const fact = ref("");

  watchEffect(async () => {
    const res = await fetch(`http://numbersapi.com/${sum.value}`);
    fact.value = await res.text();
  });

  return {
    fact,
  };
};
These types of functions are called composition functions, which are a central concept of the Composition API.
We can use Vue concepts like reactivity, computed properties and also watchEffect in our JavaScript files, even though we’re not in the context of a component.
The logic is immediately clear because the files are small and easy to read.
We also gain the ability through the division of logic into individual files to reuse these composition functions at any time in other components or in other parts of the application.
We want to demonstrate this using our CalculatorApp component:
import useAddition from "@/modules/use-addition";
import useApi from "@/modules/use-api";

export default {
  setup() {
    const { num1, num2, sum } = useAddition();
    const { fact } = useApi(sum);

    return {
      num1,
      num2,
      sum,
      fact,
    };
  },
};
The setup method is reduced to an absolute minimum. The properties needed in the template are provided to us by the outsourced functions.
However, we still need to return them using return in the component itself.
With Destructuring, the returns of the composition functions are broken down into their individual components and written to the specified variables.
As with passing sum to useApi, without the concept of refs and Reactive References, we wouldn’t be able to map the desired functionality of reactivity and would lose the references.
Through this concept of composing components, we get much better structuring and maintainability. The ability to finally structure components by logic is only possible to this extent with the Composition API.
Script Setup and Reactive Props Destructure
Vue 3.5 makes development even more pleasant with the stable <script setup> syntax and the new Reactive Props Destructure feature. Let’s modernize our Calculator component:
Script Setup Syntax
The <script setup> syntax is a more compact way to write components:
<template>
  <h3>Calculator</h3>
  <form>
    <input type="number" v-model="num1" ref="firstInput" />
    <input type="number" v-model="num2" />
  </form>
  <p>Result: {{ sum }}</p>
  <strong>{{ fact }}</strong>
</template>

<script setup>
import {
  ref,
  computed,
  watchEffect,
  onWatcherCleanup,
  onMounted,
  useTemplateRef,
} from "vue";

// Everything here is automatically available in the template - no return needed!
const num1 = ref(0);
const num2 = ref(0);
const fact = ref("");
const sum = computed(() => parseInt(num1.value, 10) + parseInt(num2.value, 10));

// Template Ref with Vue 3.5 API
const firstInputRef = useTemplateRef("firstInput");

onMounted(() => {
  firstInputRef.value?.focus();
});

watchEffect(async () => {
  const controller = new AbortController();

  onWatcherCleanup(() => {
    controller.abort();
  });

  try {
    const res = await fetch(`http://numbersapi.com/${sum.value}`, {
      signal: controller.signal,
    });
    fact.value = await res.text();
  } catch (error) {
    if (error.name !== "AbortError") {
      fact.value = "Error loading fact";
    }
  }
});
</script>
Reactive Props Destructure - New in Vue 3.5!
One of the most exciting innovations in Vue 3.5 is Reactive Props Destructure. Let’s create a new component that uses props:
<!-- NumberDisplay.vue -->
<template>
  <div class="number-display">
    <h4>{{ title }}</h4>
    <p>The number is: {{ value }}</p>
    <p v-if="showDouble">Double is: {{ double }}</p>
  </div>
</template>

<script setup>
import { computed } from "vue";

// NEW in Vue 3.5: Props can be directly destructured and remain reactive!
const {
  value = 0, // With default value
  title = "Number", // With default value
  showDouble = false, // With default value
} = defineProps();

// The destructured props are reactive - the computed is automatically updated
const double = computed(() => value * 2);
</script>

<style scoped>
.number-display {
  padding: 1rem;
  border: 1px solid #ddd;
  border-radius: 4px;
  margin: 1rem 0;
}
</style>
Before Vue 3.5, we had to awkwardly use withDefaults:
// Old (before Vue 3.5)
const props = withDefaults(
  defineProps<{
    value?: number
    title?: string
    showDouble?: boolean
  }>(),
  {
    value: 0,
    title: 'Number',
    showDouble: false
  }
)

// New (Vue 3.5) - much cleaner!
const {
  value = 0,
  title = 'Number',
  showDouble = false
} = defineProps<{
  value?: number
  title?: string
  showDouble?: boolean
}>();
Using the New Component
Now we can use our NumberDisplay component in the Calculator app:
<!-- Calculator.vue -->
<template>
  <h3>Calculator</h3>
  <form>
    <input type="number" v-model="num1" ref="firstInput" />
    <input type="number" v-model="num2" />
  </form>

  <!-- New component with props -->
  <NumberDisplay :value="sum" title="Result" :show-double="sum > 10" />

  <strong>{{ fact }}</strong>
</template>

<script setup>
import {
  ref,
  computed,
  watchEffect,
  onWatcherCleanup,
  onMounted,
  useTemplateRef,
} from "vue";
import NumberDisplay from "./NumberDisplay.vue";

const num1 = ref(0);
const num2 = ref(0);
const fact = ref("");
const sum = computed(() => parseInt(num1.value, 10) + parseInt(num2.value, 10));

const firstInputRef = useTemplateRef("firstInput");

onMounted(() => {
  firstInputRef.value?.focus();
});

watchEffect(async () => {
  const controller = new AbortController();

  onWatcherCleanup(() => {
    controller.abort();
  });

  try {
    const res = await fetch(`http://numbersapi.com/${sum.value}`, {
      signal: controller.signal,
    });
    fact.value = await res.text();
  } catch (error) {
    if (error.name !== "AbortError") {
      fact.value = "Error loading fact";
    }
  }
});
</script>
Conclusion
In this Vue.js online tutorial, you learned to write a component with Vue 3.5 on your own. In doing so, you not only learned the basic concept of working in Vue, but also tried out the latest features from Vue 3.5:
- The new
useTemplateRef()API for type-safe template references - Reactive Props Destructure for cleaner and more intuitive code
onWatcherCleanup()for better resource management- The modern
<script setup>syntax for more compact components
Vue 3.5 also brings significant performance improvements - up to 56% less memory usage and up to 10x faster operations on large arrays. These optimizations make Vue an even better choice for modern web applications.
Compared to the classic Options API, you’ve seen how the Composition API together with the new Vue 3.5 features offers an even better developer experience. Reactive Props Destructure makes the code more readable, while APIs like useTemplateRef() and onWatcherCleanup() provide more type safety and better resource management.
Want to try out these new features yourself? The Composition API and all Vue 3.5 features are available now and production-ready! Exchange ideas with other users in our free Discord Chat!
We are currently working on many more articles on Vue.js, especially the innovations of Vue 3.5 will be examined more closely on this site. So check back regularly to be the first to learn about all the news. Happy learning!
If you need support, check out how our trainer David does the tutorial:
💡 Did this tutorial help you?
We also offer Vue Intensive Training to guide you as effectively as possible into the topic of Vue. In the course, you can ask the questions that are hard to google, e.g., "Better way to structure my application?". We can answer them for you.
Continue learning now

Weitere Artikel

Vue 3.5 Tutorial für Einsteiger
Einsteiger Tutorial für das Javascript Framework Vue.js in Version 3.5. Schritt für Schritt erklären wir dir die Konzepte und Verbesserungen der Composition API sowie die neuen Features von Vue 3.5.

Vue 3 <script setup>-Tutorial
Seit dem Release von Vue 3 und der Composition API ist die <script setup>-Syntax die empfohlene Schreibweise. Welche Vorteile sie bietet, klären wir in diesem Artikel.

Vue 3 provide/inject-Tutorial
Wie provide/inject in Vue 3 genutzt werden kann, um prop drilling zu vermeiden und Daten sicher über mehrere Komponenten zu teilen, erfahrt ihr in diesem Artikel.
